When you hire National Security & Alarm Installers Co. Ltd for Professional Security Camera Installation in Brooklyn NY, one fundamental expectation is that you can monitor your property from anywhere. But many users struggle with remote viewing: the live feed won’t load, the app connection fails, or the quality is poor. This guide is written for real people—homeowners, small business owners, security enthusiasts—who want to set up and use remote access confidently. I’ll walk you through each step, cover common pain points (network issues, app glitches, firewall problems, credentials, and compatibility), and help you gain peace of mind as you watch your birds, pets, or packages from miles away.
Why Remote Viewing Matters—and What Holds People Back
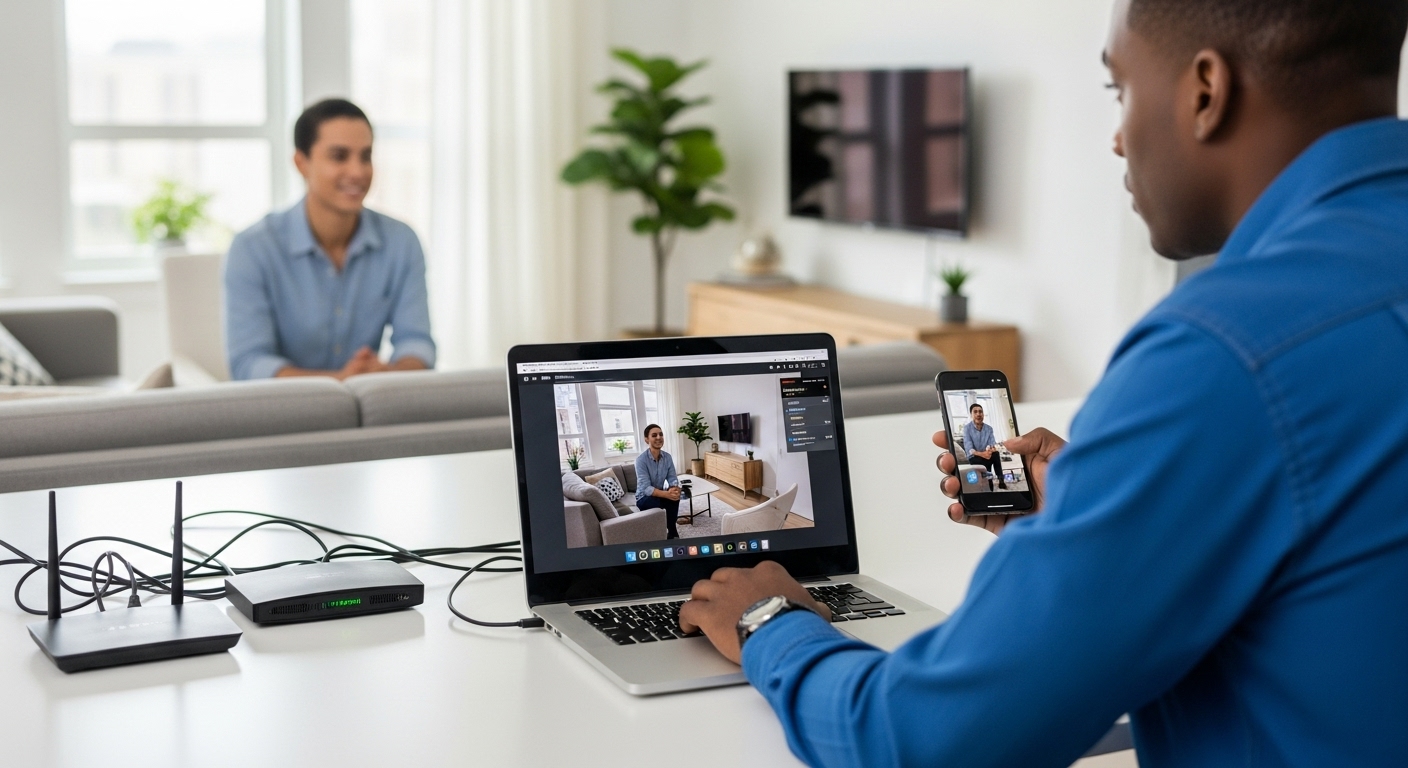
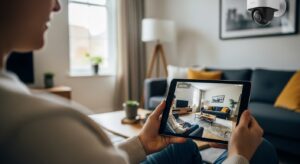
Remote viewing means your security camera streams live or recorded video to a smartphone, tablet, or web browser even when you’re offsite. It’s essential for home security camera system installation, business security camera installation, or integration into a Smart Home Security Integration Brooklyn NY setup. But I’ve heard frustrations over and over:
- The camera app shows “offline”
- The feed is stuck or lags heavily
- You can’t forward ports or the IP is blocked
- You forget login credentials or the admin password
- Firmware or software version mismatches
- Your internet plan’s upload speed is too low
To counter these issues, the next sections break the process into clear phases. Also, involving a trusted security camera contractor or using CCTV security installers helps avoid pitfalls. I’ll refer you to examples of setups and comparisons in a table to make choices easier. Use this guide as a checklist beside your installation of security camera installation home or home security camera system installation near me.
Step 1 – Prepare Your Hardware & Network
Before configuring software, ensure your physical and network setup is ready. These are prerequisites that many users overlook:
- Camera connection: The camera should be wired via Ethernet or strong Wi-Fi (if model supports). A wired PoE (Power over Ethernet) camera reduces dropouts.
- Router capacity: Use a router with sufficient bandwidth and stability. Older or budget routers sometimes block dynamic DNS or multiple ports.
- Static or reserved IP: Assign a static internal IP (e.g. 192.168.1.50) or reserve it via DHCP so your camera doesn’t shift addresses.
- Check upload speed: Use an online speed test. Aim for at least 1–2 Mbps per camera for 1080p remote streaming.
- Firewall and NAT settings: Your router shouldn’t block the camera’s port, and UPnP or manual port forwarding has to be enabled.
- Power reliability: Use an uninterruptible power supply so the camera and router stay live during brief outages.
If you’re working with CCTV Camera Installation Services in NY or hiring security camera installers, they’ll usually take care of many of these hardware tasks. But if you do it yourself or want to understand what the installer needs to do, these checks prevent the most common connectivity failures.
Step 2 – Configure the Camera & Enable Remote Access
Once your hardware is ready, you move into the software setup. This can be fiddly, so go slowly and double-check each step.
A. Access camera settings locally
Use the vendor’s app or browser interface with the camera’s IP (e.g. http://192.168.1.50). Log in using the default credentials, then change admin password. Many failure points begin when users skip this.
B. Enable remote access features
Most modern models support one or more of these:
- P2P or cloud service (vendor-hosted)
- Dynamic DNS (DDNS)
- Manual port forwarding
If the camera supports vendor cloud/P2P, it often sidesteps manual network configuration. But some users worry about privacy or vendor outages. That’s why DDNS (e.g. “yourname.dyndns.org”) plus manual port forwarding remains a reliable fallback.
C. Forward ports & firewall rules
Open TCP/UDP ports (commonly 80, 554, 8000, 8554) in your router pointing to the camera’s internal IP. Add firewall rules to allow incoming traffic. Avoid using default ports when possible (use 8088 or other high ports) to reduce scanning risk.
D. Test local and external access
From your local Wi-Fi, access the stream using the camera’s IP. Then switch your device to mobile data (or another network) and use the public IP or DDNS (plus port) to test remote access.
During installations done by home security camera installers, these steps are often handled behind the scenes. But if you’ll manage it yourself or audit a contractor’s work, knowing each phase ensures your remote viewing won’t break later.
Step 3 – Choose and Use the App or Client
Even when the backend is correct, a poorly built or misconfigured app can spoil remote access. Here’s how to choose and use it properly:
- Use the official app or recommended third-party app (check compatibility).
- Use credentials (username, password) distinct from admin account (for better security).
- Choose H.264 or H.265 compression and 480p–720p stream if bandwidth is limited.
- Enable notifications or motion alerts if supported—some apps offer push alerts.
- Regularly update the app and firmware to patch security holes.
Many users complain: “I see the feed on Wi-Fi but not when I’m gone.” That typically results from misconfigured mobile app settings or incorrect server addresses. If you run into that, switch the app to “manual connect” mode and enter your DDNS + port. If that fails, review router logs or consult a s service provider or security camera companies for advanced troubleshooting.
Step 4 – Secure and Troubleshoot Your Remote Access
Security is a big concern. Allowing remote access opens paths for attackers. Also, when things fail (feed not loading, stream freezing), you want a systematic way to fix it.
Security best practices
- Use strong, unique passwords (avoid “admin123”).
- Change default ports away from well-known ones.
- Enable encryption (HTTPS, SSL, TLS) if the camera or software offers it.
- Limit access by IP or set up VPN (a secure option).
- Monitor logs—if your device software shows login failures, act fast.
Common issues and solutions
| Issue | Cause | Fix |
|---|---|---|
| No external feed | Port forwarding wrong or ISP blocks ports | Recheck forwarding, use alternate port or use VPN/Cloud option |
| Feed lags or freezes | Bandwidth too low or network congestion | Lower video quality, limit other users’ bandwidth, upgrade plan |
| App shows “offline” | DNS resolution failed or credentials wrong | Double-check DDNS, server address, username/password and camera uptime |
| Firmware incompatibility | Camera and app versions don’t match | Update both to latest compatible versions |
| Random disconnections | Router resets, power spikes, or interference | Use UPS, stable router, wired connection if possible |
These are pain points many homeowners face when setting up security camera installation for home near me or hiring local security camera installer. If you document each step and go slowly, you’ll avoid hours of frustration.
Comparing Remote Access Methods (Tabular Comparison)
Here’s a side-by-side view to help you pick between common remote access styles:
| Method | Ease of Setup | Privacy & Control | Dependence on Vendor | Compatibility |
|---|---|---|---|---|
| Vendor Cloud / P2P | Very easy, plug-and-play | Less control (vendor holds stream) | High | Works across devices, minimal config |
| DDNS + Port Forwarding | Moderate | You control, high privacy | Low (you host) | Works with many clients and browsers |
| VPN into home | Harder for average users | Highest security/control | None (self hosted) | Works like local network, app agnostic |
If you hire CCTV installation companies or electrician security camera installation, they’ll often propose the method suited to your comfort with networking and security. At National Security & Alarm Installers Co. Ltd, we frequently tailor our Custom Security Consulting Brooklyn NY packages to use either vendor cloud for ease, or DDNS/VPN for clients who prioritize control.
Tips to Maintain Reliable Remote Viewing Over Time
Once everything works, don’t just forget it. Many remote access problems stem from changes over time:
Monitor firmware updates and upgrade responsibly (always back up settings).
Review router logs monthly to detect unauthorized attempts.
Change passwords periodically.
Check your ISP plan – if more cameras are added, your upload capacity may need upgrade.
If adding more cameras later, plan for port conflicts or bandwidth hogging (use smart grouping).
Keep a local backup or NVR in case the cloud or remote link fails.
Document your setup: internal IPs, port numbers, DDNS address, app settings.
These practices reduce long-term pain points and prevent sudden outages. They also align with peace of mind people want from a security camera home installation or business security camera installation.
Final Thoughts & When to Call Experts
By now you know the path from hardware readiness through remote configuration, app choice, security hardening, and long-term maintenance. Whether you’re setting up home security camera installers in your own DIY project or working with security camera contractors near me, this guide helps you understand each decision. If you’re in Brooklyn or New York area and you want reliable, professional service, Professional Security Camera Installation in Brooklyn NY from National Security & Alarm Installers Co. Ltd ensures all steps—network, camera, app—work seamlessly.
If you encounter a stubborn problem:
Your feed still won’t connect externally
The app keeps timing out
You want VPN or zero-trust setup
then it’s time to engage a specialist. We handle security camera systems installation, CCTV home security installation, outdoor home security cameras installation companies, and more. Our full stack approach includes electronic security system installation, smart home security integration, and security camera installation contractors. Reach us and we’ll resolve complexity for you.
Thank you for reading. I hope this guide empowers you to watch your security feed from anywhere, securely. For direct help, contact National Security & Alarm Installers Co. Ltd at 718-760-9305.